How To Test Wires With Multimeter: The Ultimate Guide For Beginners And Professionals
Testing wires with a multimeter is an essential skill for anyone working with electrical systems, whether you're a DIY enthusiast or a professional electrician. Understanding how to use a multimeter correctly ensures safety and accuracy when diagnosing electrical problems. In this comprehensive guide, we'll walk you through the process step-by-step, covering everything from basic safety tips to advanced techniques.
Electrical troubleshooting can be daunting, especially if you're new to the field. However, with the right tools and knowledge, testing wires becomes a straightforward task. A multimeter is one of the most versatile tools available for electrical testing, offering precise measurements of voltage, current, and resistance. This guide will help you master its use.
Whether you're testing household wiring, automotive systems, or electronic circuits, knowing how to test wires with a multimeter is crucial. By the end of this article, you'll have the confidence and skills to perform accurate tests safely and efficiently. Let's dive in!
Read also:Is Nicki Minaj Asian Exploring Her Heritage And Influences
Table of Contents
- Introduction to Multimeters
- Safety Precautions When Using a Multimeter
- Types of Multimeters
- Setting Up Your Multimeter
- How to Test Voltage in Wires
- How to Test Resistance in Wires
- How to Test Continuity in Wires
- Common Issues and Troubleshooting
- Tips for Accurate Testing
- Conclusion
Introduction to Multimeters
A multimeter is a versatile tool used to measure electrical parameters such as voltage, current, and resistance. It is indispensable for anyone working with electrical systems, from hobbyists to professionals. The ability to test wires with a multimeter allows you to diagnose problems accurately and efficiently.
Why Use a Multimeter?
Using a multimeter offers several advantages:
- Precise measurements of electrical parameters
- Ability to test voltage, current, and resistance in one device
- Compact and portable design
- Cost-effective compared to specialized testing equipment
By mastering the use of a multimeter, you can save time and money while ensuring the safety of your electrical systems.
Safety Precautions When Using a Multimeter
Safety should always be your top priority when working with electrical systems. Here are some essential safety tips to follow:
- Always turn off the power source before testing wires.
- Wear appropriate personal protective equipment (PPE), such as insulated gloves and safety glasses.
- Ensure your multimeter is rated for the voltage and current levels you'll be testing.
- Inspect your multimeter probes for damage before use.
- Never touch the metal parts of the probes while testing live circuits.
Following these safety precautions will help you avoid accidents and ensure accurate testing results.
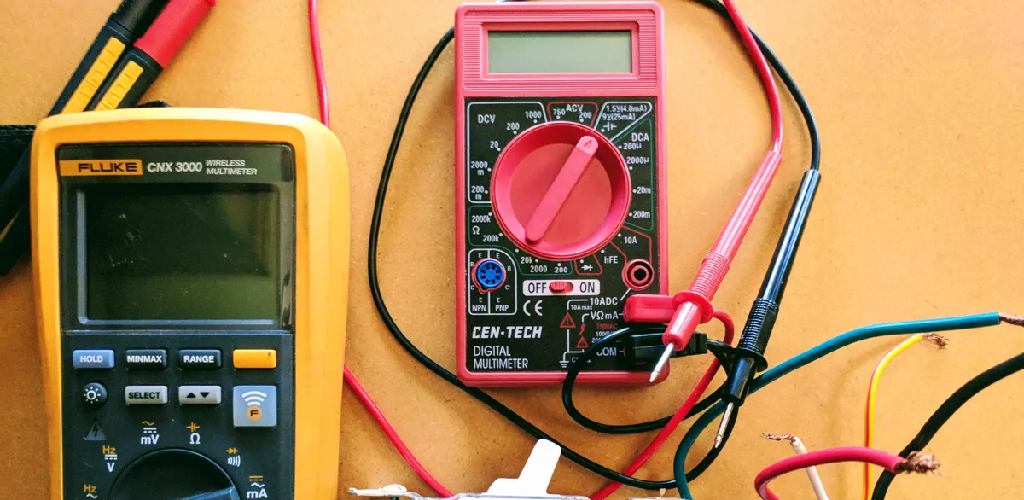
Types of Multimeters
There are two main types of multimeters: analog and digital. Each has its own advantages and disadvantages.
Read also:How To Effectively Call Amazon Customer Service Phone Number For Seamless Support
Analog Multimeters
Analog multimeters use a needle to indicate measurements on a scale. They are less common today but still used in some applications.
- Advantages: Simple design, no need for batteries.
- Disadvantages: Less precise readings, harder to interpret results.
Digital Multimeters
Digital multimeters (DMMs) are the most widely used today due to their accuracy and ease of use.
- Advantages: Precise digital readouts, multiple measurement functions.
- Disadvantages: Require batteries, can be more expensive.
For most applications, a digital multimeter is the preferred choice due to its accuracy and ease of use.
Setting Up Your Multimeter
Proper setup is crucial for accurate testing. Here's how to set up your multimeter for testing wires:
- Turn on your multimeter and select the appropriate measurement function (voltage, resistance, etc.).
- Insert the probes into the correct ports on the multimeter. The red probe typically goes into the "VΩmA" port, while the black probe goes into the "COM" port.
- Set the range if your multimeter requires it. Most digital multimeters have an auto-ranging feature, but some require manual adjustment.
Once your multimeter is set up, you're ready to begin testing.
How to Test Voltage in Wires
Testing voltage is one of the most common uses of a multimeter. Here's how to do it:
- Select the voltage measurement function on your multimeter. Use AC (Alternating Current) for household wiring and DC (Direct Current) for batteries or automotive systems.
- Touch the probes to the wire terminals or test points. Be sure to maintain a firm but gentle contact.
- Read the voltage measurement on the display. Ensure the reading is within the expected range for the circuit you're testing.
Testing voltage helps you determine if a circuit is receiving the correct amount of power.
Common Voltage Ranges
Here are some common voltage ranges for different applications:
- Household wiring: 110V or 220V AC
- Automotive systems: 12V DC
- Electronic circuits: 5V, 9V, or 12V DC
Knowing the expected voltage range for your application will help you interpret the results accurately.
How to Test Resistance in Wires
Testing resistance is useful for diagnosing issues such as broken wires or faulty components. Here's how to do it:
- Turn off the power to the circuit you're testing.
- Select the resistance measurement function on your multimeter.
- Touch the probes to the wire terminals or test points.
- Read the resistance measurement on the display. A low resistance reading indicates a good connection, while a high or infinite reading may indicate a break in the wire.
Testing resistance helps you identify issues that may not be visible to the naked eye.
How to Test Continuity in Wires
Continuity testing checks whether a circuit is complete and uninterrupted. Here's how to do it:
- Turn off the power to the circuit you're testing.
- Select the continuity measurement function on your multimeter. This is often indicated by a diode symbol.
- Touch the probes to the wire terminals or test points.
- Listen for an audible beep or check the display for a continuity indication. A beep or low resistance reading indicates a complete circuit.
Continuity testing is a quick and easy way to verify the integrity of a circuit.
Common Issues and Troubleshooting
Even with proper technique, you may encounter issues when testing wires with a multimeter. Here are some common problems and solutions:
Incorrect Readings
If you're getting inconsistent or unexpected readings, try the following:
- Ensure the multimeter is set to the correct measurement function and range.
- Inspect the probes for damage or corrosion.
- Check the battery level in your multimeter.
No Continuity Beep
If you're not getting a continuity beep, check the following:
- Ensure the circuit is powered off.
- Verify the continuity function is selected on your multimeter.
- Check for breaks or corrosion in the wire.
Addressing these issues will help you obtain accurate and reliable test results.
Tips for Accurate Testing
Here are some additional tips to ensure accurate and safe testing:
- Always double-check your settings before testing.
- Keep your workspace clean and organized to avoid accidents.
- Regularly calibrate your multimeter to maintain accuracy.
- Consult the user manual for your specific multimeter model.
Following these tips will help you become a more proficient and confident user of your multimeter.
Conclusion
Testing wires with a multimeter is a critical skill for anyone working with electrical systems. By following the steps and tips outlined in this guide, you can perform accurate and safe tests with confidence. Remember to always prioritize safety and consult reliable sources for further information.
We encourage you to share this article with others who may benefit from it. Leave a comment below if you have any questions or additional tips to share. Happy testing!


